Learn How to create a Content Locker on CPABuild Network extract a URL to include in your Landing Page and start generating money.

To make money with CPA marketing, users have to complete an action to unlock the content they want: gift card, movie, game currency, etc…
There are tons of different locker designs and processes, but we will focus on anti-spam lockers. You ask the user to complete a task (download a game or complete a survey) to prove that he is a human. If the user wants to get his content, he will complete the action for what he thinks is anti-spam protection.
1. Register on AdBlue Media (ex CPABuild)
The first thing to do if you want to create a content locker on CPABuild is to have an approved account. You can use our dedicated guide to easily get approved on any CPA Network. The registration process is not difficult on CPABuild and you should get your account in less than 24 hours, even if there’s a submit and manual verification.
You can use our referral link below to get quickly approved. I will provide personal support and mentoring if you are under my referral.
2. Design and Customize your AdBlue Media Content Locker
When you are approved on CPABuild, you can connect through the platform and access the main dashboard.
From this dashboard, and as seen in the capture below, go to:
- “Content Locker”
- “Build / Modify Locker”
- “Visual Editor by Prime” – Note: You can use the other templates but you have fewer customization options. We will only cover Prime’s editor in this tutorial.

Then you can click on “Build Now” to access the Prime Editor.

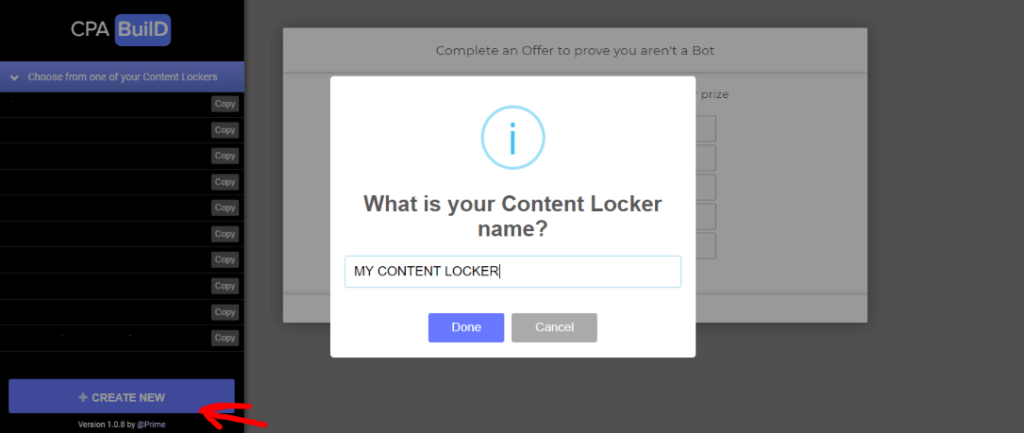
Now click on “Create New” to create a new locker. You can assign a custom name to your locker. Try to be organized with your locker name even at the beginning, it will be easier after if you want to optimize/edit your lockers.

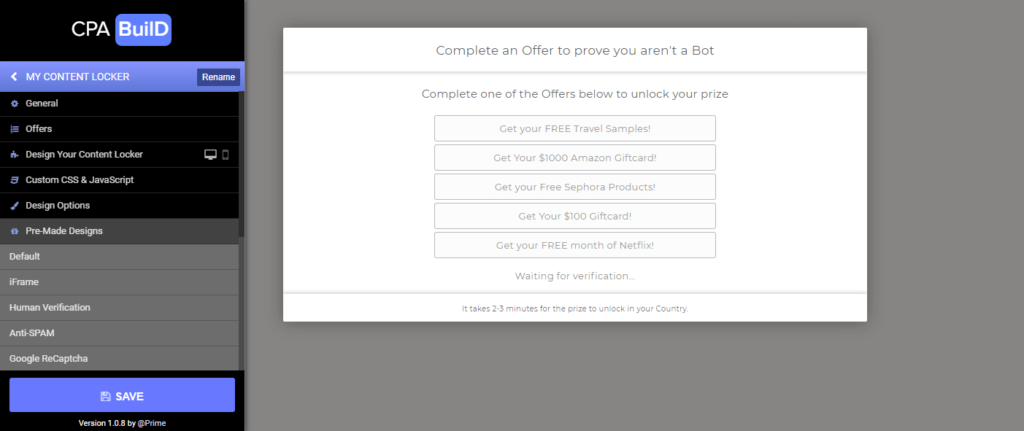
There are tons of different layouts and customization you can add to your locker. I will create a dedicated tutorial on how to properly customize your locker and increase your conversion rate. Anyway, if it’s your first content locker, the basic template will be more than enough to start. I wouldn’t touch any of the “offers” settings at first, they are already optimized.

During your customization process, keep in mind that it has to be simple. Then you can save it and grab your URL to implement it on the landing pages. To generate a URL to your locker, you can click on “Build a Link / Code for Website” and it will open a new tab.
3. Extract your AdBlue Media content locker URL
On this new tab, you can select a locker and generate a URL. The very nice thing with CPABuild is that you can get a URL that will redirect the desktop’s users to a dedicated locker different than the mobile’s user locker. You just need to test and see what works better, don’t overthink this step and just start with something.
You will optimize it when you receive enough traffic, at least 100-200 daily clicks.

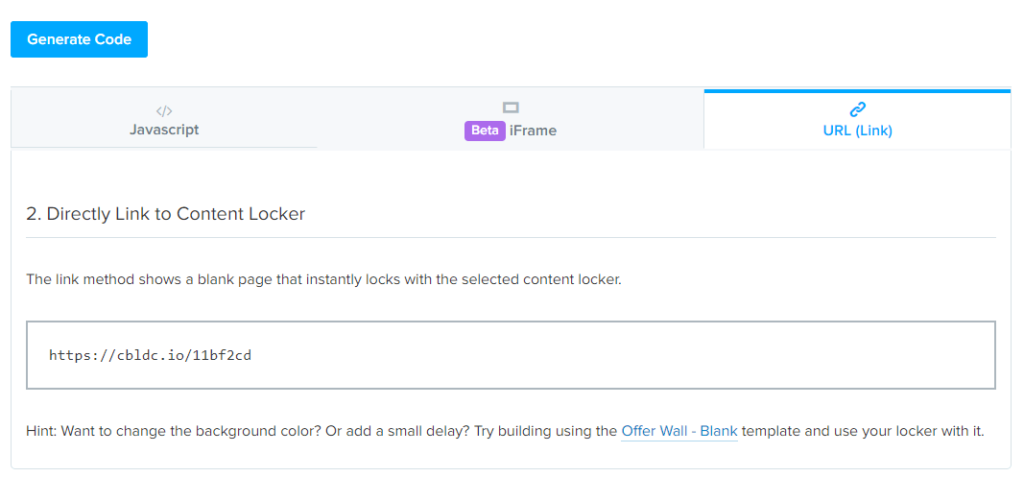
Select the content locker you just created and click on “Generate Code”. Select the ‘URL (Link)’ tab, copy the link and that’s done! You have a URL that will redirect users to your content locker.
You can try to open it on a web browser to check if it’s working properly.
In our example, cblc.io/11bf2cd is our locker URL, which we will replace on the landing page with the LOCKERURL variable as shown in our tutorial.

Option: You can use various mirror URLs offered by CPABuild. It will help give some diversity to your locker’s URL and reduce the spam flag. You will find the mirrors in “Links”, and “Mirrors”. You need to replace the last 5 digits of the mirror with the digit locker.
(In our example the last 5 digits are “11bf2cd”, and we could create a mirror-like bitsc.io/11bf2dc.


